
Alright, let's dive into the quirky world of building apps. Imagine you’re building this super cool app with FlutterFlow. It’s all fun and games until you decide, “Hey, I need an admin panel because I’m the boss and I wanna manage all my peeps!” So, you start dreaming up this nifty dashboard where you can do all the boss things, like creating accounts for your admin buddies or your lovely customers. FlutterFlow and Firebase have been playing nice, making everything smooth like butter until...BAM! You hit this oddball restriction.
Now, you thought FlutterFlow was your BFF, but then you realize it’s giving you the silent treatment when you wanna create user accounts directly from your admin dashboard. “What gives?” you wonder, as you sulk, feeling betrayed by your digital buddy. Then, after some detective work (and maybe a few tears), you discover it’s actually Firebase playing security guard, saying, “Nope, not on my watch!” They’re all about keeping things on the down-low and secure, advising against using the client SDKs for creating accounts. Their docs are like, “Hey, run this on a server you trust,” and you’re there thinking, “Servers? Trust? I just wanted to make an app!”
Feeling like you’ve hit a techy version of writer's block, you're about to throw in the towel on your admin panel dreams. But hold up! What if I told you there’s a secret tunnel under this wall?
Here’s the game plan: We’re going to use Firebase Cloud Functions, which is basically like having a magic wand that lets you run code in the cloud. It’s perfect for doing things that you don’t want to expose to the prying eyes of the internet. So, I whipped up this cool cloud function that you can deploy right from FlutterFlow. It’s like sending a secret message to Firebase saying, “Hey, please create this user for me, thanks!” And Firebase is like, “Sure thing, buddy!”
1. Setup Check: Make sure your FlutterFlow and Firebase are working together well and you’ve got the Firebase Blaze plan. It’s a bit more expensive, but hey, magic isn’t free!
Make sure you have a users collection and also a user_type flag set. you don’t want any random person to access this, do ya? we are having 2 types of users here – user and admin. Feel free to tweak this as per your requirement.

2. Cloud Function Magic: Write a cloud function createNewUserAsAdmin that takes the details (email and password) and tells Firebase to create a user. It’s like whispering sweet nothings to Firebase, and it just can’t say no. Don’t worry, I’m not going to make you write this code. Ctrl C + Ctrl V to the rescue! code below 👇
const functions = require('firebase-functions');
const admin = require('firebase-admin');
const {
getAuth
} = require('firebase-admin/auth');
// To avoid deployment errors, do not call admin.initializeApp() in your code
exports.createNewUserAsAdmin = functions.region('us-central1').
runWith({
memory: '128MB'
}).https.onCall(
async(data, context) => {
if (!context.auth.uid) {
return;
}
const newInputEmail = data.newInputEmail;
const newInputPassword = data.newInputPassword;
// Write your code below!
try {
console.log(context.auth.uid);
const db = admin.firestore();
const userRef = db.collection("users");
const currentUser = userRef.doc(context.auth.uid).get();
const user = (await currentUser).data();
if (user.user_type != "admin") {
return {
status: 'error',
code: 401,
message: 'Unauthorized to create a new us',
success: false
};
}
//create authenticated user in auth tab of firebase
const newUser = await getAuth().createUser({
email: newInputEmail,
password: newInputPassword,
//emailVerified: false,
//phoneNumber: '+11234567890',
//displayName: 'John Doe',
//photoURL: 'http://www.example.com/12345678/photo.png',
//disabled: false,
});
//create document in firestore
if (newUser) {
const createUser = await userRef.doc(newUser.uid).set({
email: newUser.email,
uid: newUser.uid,
user_type: "user" //define user type for new user
});
}
return {
status: 'ok',
code: 200,
message: 'Successfully created',
success: true
};
} catch (error) {
return {
status: 'error',
code: 500,
message: ${error},
success: false
};
}
// Write your code above!
}
);
Your cloud function settings in FlutterFlow should look like this screenshot below! 👇

3. Deploy: Shoot that cloud function into the cloud. Firebase gives you a URL, kind of like giving you the key to the secret tunnel.

4. FlutterFlow Does the Heavy Lifting: Back in FlutterFlow, set up an action that calls your secret tunnel whenever you need to create a user. It’s like having a remote control for Firebase. This action should look something like this:
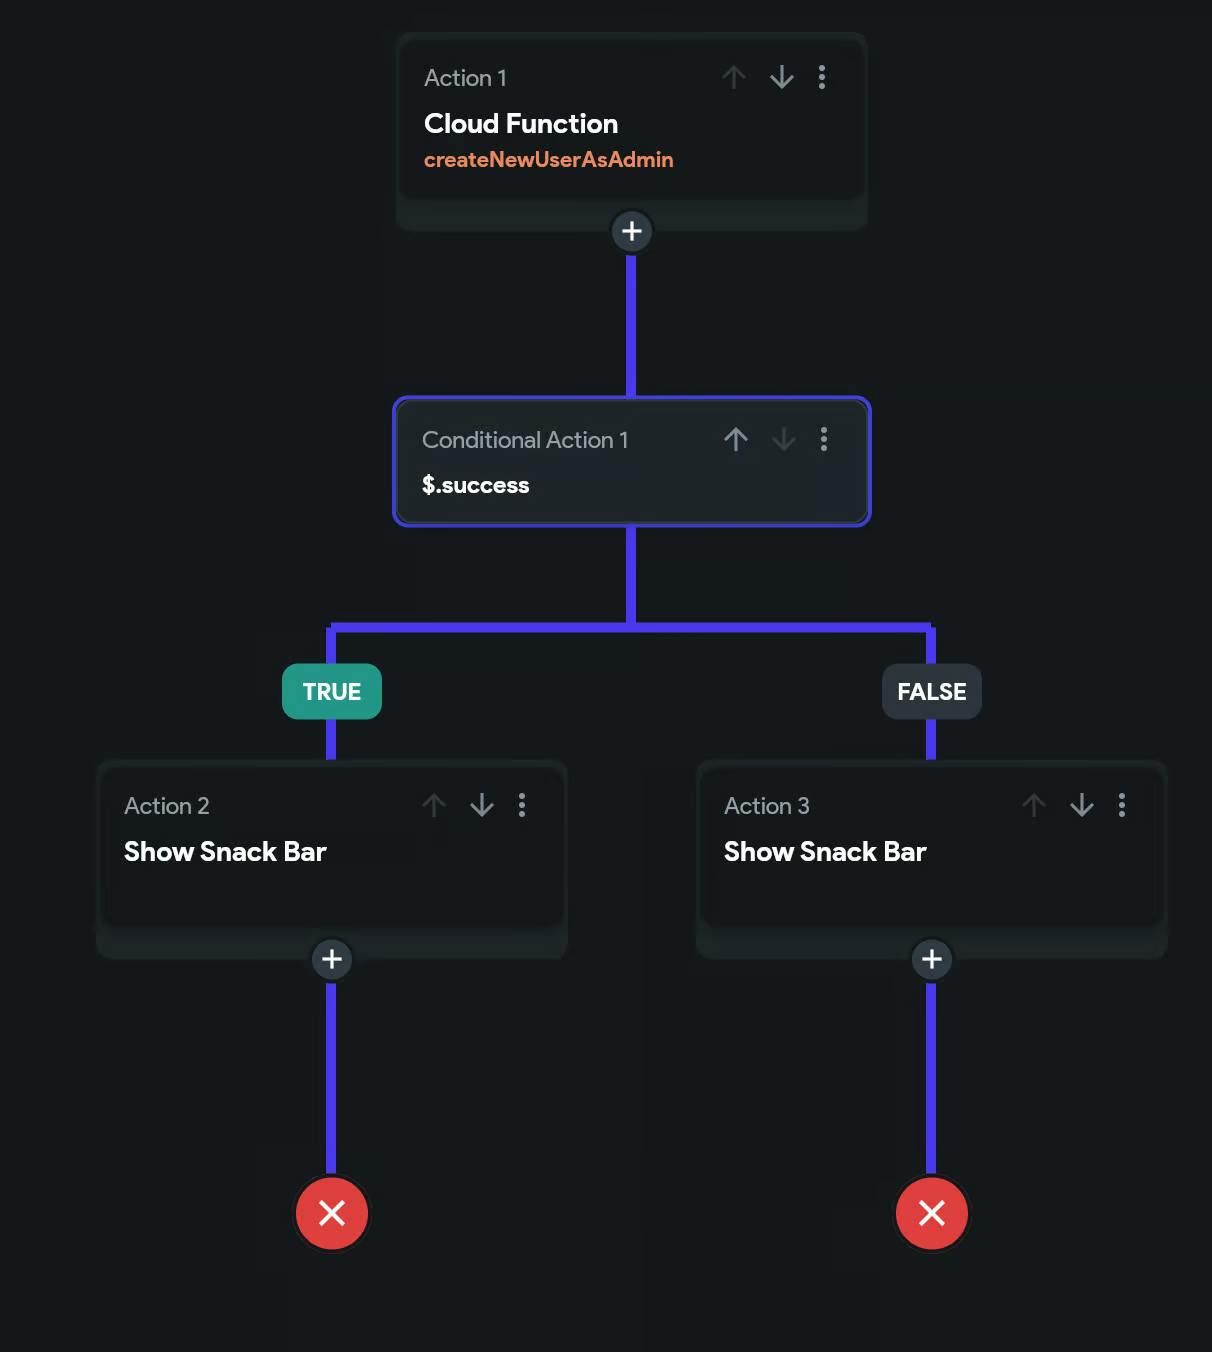
5. Testing, 1, 2, 3: Don’t just take my word for it. Give it a whirl, create some users, and watch as your admin panel dreams come true.
And voilà! You’ve just sidestepped that giant wall and made something awesome. FlutterFlow and Firebase are back in your good books, and you’re the tech wizard in your own fairy tale. Remember, where there’s a will, there’s a way, especially in the wacky world of app development. Keep that creative spirit alive, and never let a little tech hiccup dampen your parade! Until next time! 🎉